
You’re on a trip of a lifetime to your favorite forested national park. The family came with you, and you are all enjoying the sights, fresh air, and exercise.
But then you get back to the computer for the first time since that trip. All your photos from deep in the forest are blurry. Your heart drops. You can’t go back and get those pictures done again. Even if you did, how would you get the photos right?
Getting sharp photos in forests means getting more light into your camera. You can achieve this with tips on five factors: shutter speed, aperture, ISO, post-processing, and lens choice.
1. Shutter Speed

If you’re used to taking photos in automatic mode, your shutter speed suffers in forests. Automatic mode, in a low-light environment, sacrifices your shutter speed.
You click your shutter, think you hear the action immediately, and move. Oops. Instead, the shutter took extra time to gather light. That time means recording movement.
Even if you hold still, your arms and breathing shift the camera enough. You’ll get that blurry photo you’re trying NOT to take.
For this reason, your best bet in the forest is to shoot in shutter-priority mode. Your camera will shift other settings to accommodate your shutter.
If you choose to bring a tripod to overcome this issue, you still risk objects in the forest shifting on you. So you’d still have a blurry photo when you don’t want it.
Thus, make a point to shoot in shutter priority mode. It leverages your situation the most. It also might be the only change you need.
2. Aperture

Sometimes you want to use a different setting other than shutter priority.
For instance, the background is a distraction if you want to take a close-up of fungi on the forest floor. Aperture will give you the depth of field you need to make the photo work.
If you like to take these photos, then aperture-priority mode is for you. Aperture priority lets in more light over a wider area instead of time like with shutter speed.
3. ISO
You might be thinking, “But high ISO adds graininess to photos. I don’t want that. That’s hardly better than blurriness.”
Yes and no. You want to adjust shutter speed and aperture to get the look you want. If those settings are not enough, you should have a tripod or a good flash rig.
You need a tripod and flash if you can’t conquer low-light with shutter speed and aperture. That extra equipment needs time to set up and weighs you down on a hike.
But the point of this discussion is to NOT overwhelm you with time and equipment. High ISO helps with this.
The average view may not notice graininess. And it even has an aesthetic that many photographers respect.
There are two ways to notice high ISO grain:
- You zoom in on the photo in editing software on your computer, or
- You compare the same photo shot twice with different ISOs
Most people aren’t going to study your photos that hard. So amp up the ISO. In a forest setting, the graininess won’t kick in until 3200, depending on how shaded the scene is.
4. Post-Processing

Armed with Adobe Photoshop or Windows Photos for editing, you can make up for issues in the forest. The principle here is that less is more.
Mild adjustments can help a lot. Major adjustments might look fine at first but can look awful when you see the image days later.
Better yet, keep original copies of all your photos. Then, make new copies that you edit. If those copies don’t work out, you still have the originals.
Also, the more times you save an image as a JPG, the more data gets lost. So if you keep coming back to edit that image, it’ll become grainy even if it was sharp.
Especially in the case of low-light photography, shoot your images in RAW if you can. JPGs condense—and thus lose—data. RAW retains all information. So when you go to your computer to edit, you can make more adjustments without overdoing them.
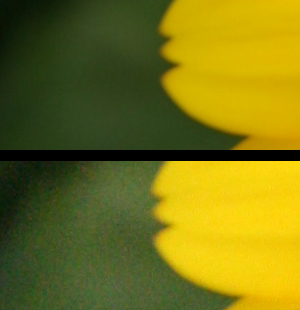
For instance, say I want to saturate the image more. I have one red flower. Subtle greens, grays, and browns surround the flower.
If I increase color saturation in JPG, that flower might lose information. It may become a single red mass instead of having its original texture or subtle variations of red. RAW would spare me that and pick up more data on darker areas.
5. Prime Lenses

Prime lenses have a secret talent. They make up for their locked focal length by being the best at letting in light. If we compare lenses at the same settings, prime lenses get more details, contrast, and color.
Prime lenses achieve this with streamlined machinery. You might like telephoto lenses like your 18-55 mm kit lens or your 55-200 mm standard zoom lens. But changing the focus means a lot of machinery has to move around.
Prime lenses locked at 50 mm, for example, lack those obstructions. That lack means more light, faster. If you don’t mind sacrificing zoom, prime lenses work best in low-light situations.
Conclusion: How to Beat the Shade: 5 Tips to Take Sharp Photos in Forests
You can achieve sharp photos in a forest with a few adjustments to your camera. Changing aperture, shutter speed, ISO, post-processing, and prime lenses will let in more light. That light helps the camera understand the shapes and colors in the scene.
If you want to learn more about forests and the products and art from them, subscribe to this blog. You’ll hear from me the next time I post.

