How to Customize Your Project with Templates
How to Customize Your Project with Templates
Introduction
Scrivener templates are key to an effective workflow. Anyone can make them, and many people offer them for free from their websites. Scrivener also comes with many default templates for its core audience of novelists, playwrights, and academics.
This mini-tutorial is the building block for the other tutorials and understanding conceptually how key templates are in Scrivener. Before we can get to templates for professional writers, this shows you how to get started with templates in general.
Mini-Tutorial
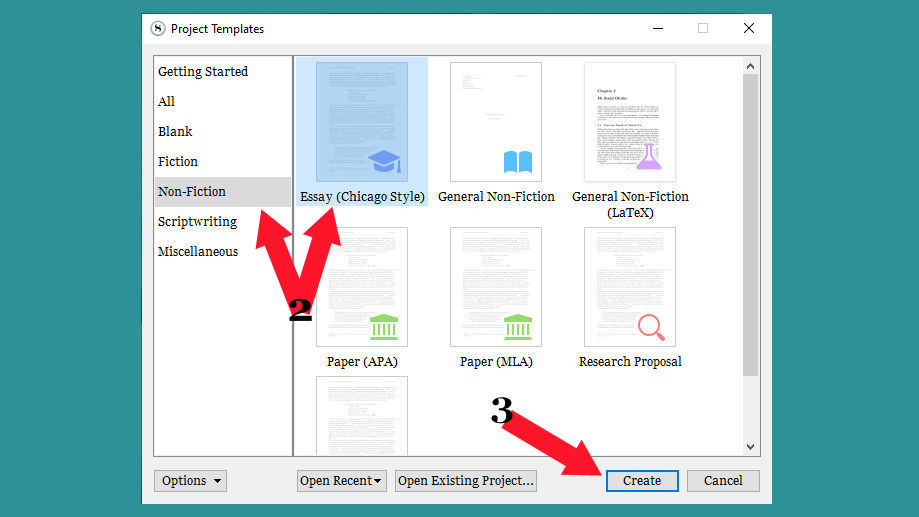
- Start with the New Project window Scrivener opens with.
- This window has your existing templates. Click one from a category of your choosing.
- At the bottom, click Create.
- From here with any template, you can customize. Rename and drag-and-drop as you see fit. Play around and get acquainted if you haven’t before.
Conclusion
That’s how to customize your project with templates. With this, you can begin your exploration of the broader possibilities of using templates. Once you have a feel for it, you will appreciate and enjoy how much more efficient using Scrivener becomes.
In the next tutorial, I’ll expand on this with How to Import a Template. Importing Templates will let you download free Templates online that more closely address professional writing niches.
Created with the Personal Edition of HelpNDoc: Full-featured Documentation generator