How to Create a Custom Template
How to Create a Custom Template
Introduction
If you follow only one tutorial here, you should follow this one. The entire point of this guide is to help you learn how to create custom templates that, once you overcome Scrivener’s learning curve, will have you working at your best. The tutorials before this one were stepping stones, and the tutorials after this one are specific approaches you should find useful.
Fundamentally, this is all about learning how to create the perfect custom templates for your work.
Tutorial Part I: Project Templates
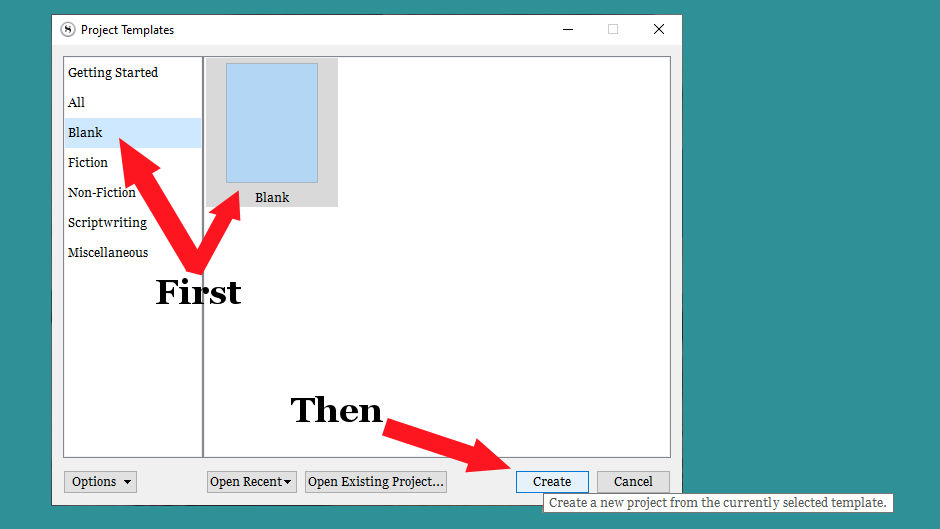
- From the Project Templates window, click Blank, and then click Create.
|
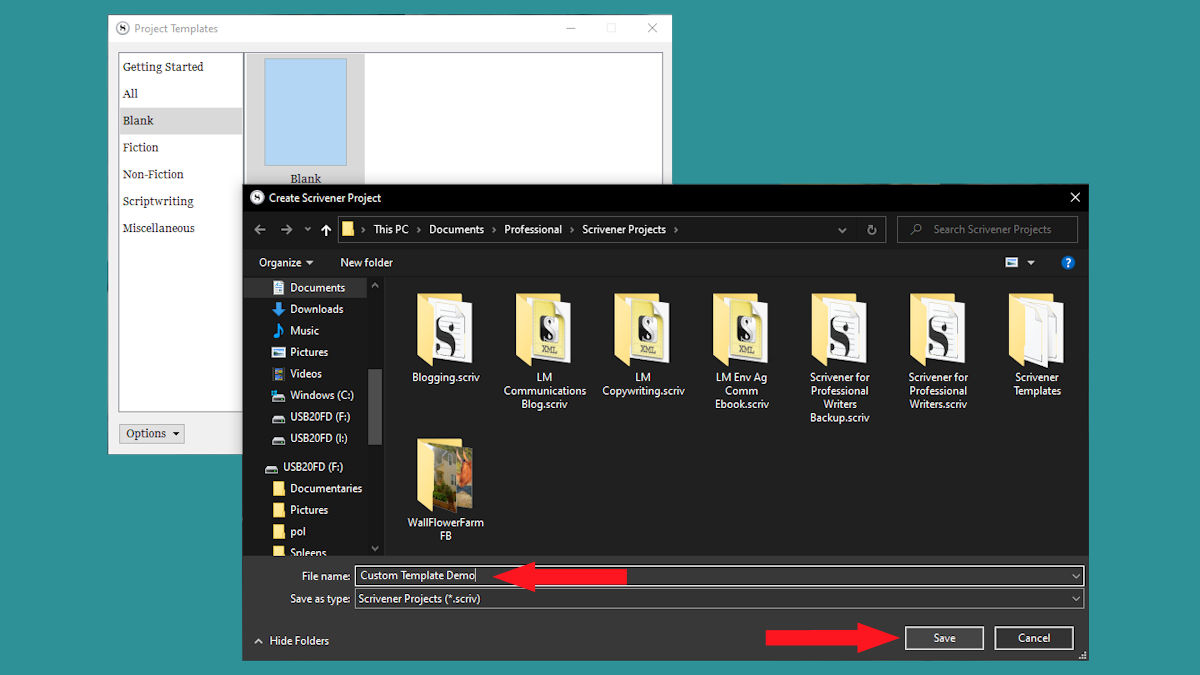
- Name your project and click Save.
- Templates often come with a basic information file at the top. Add a file, call it something like How to Use This Template, and drag it to the top.
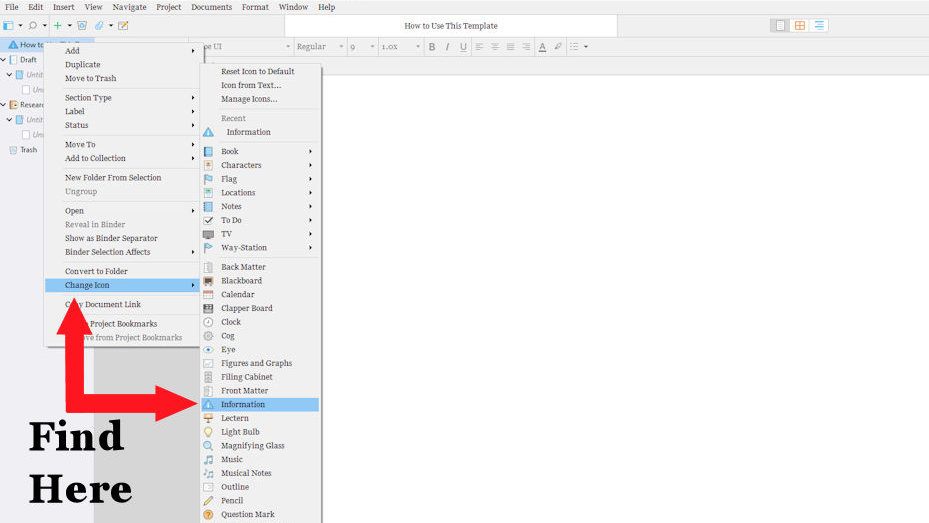
- Right-click the file. In the context menu, point to Change Icon, and in the next menu click Information.
- Add a description in the Editor for the How to Use This Template file.
- Add, Move to Trash, drag from other templates, and arrange your Binder to create the ideal template for your needs.
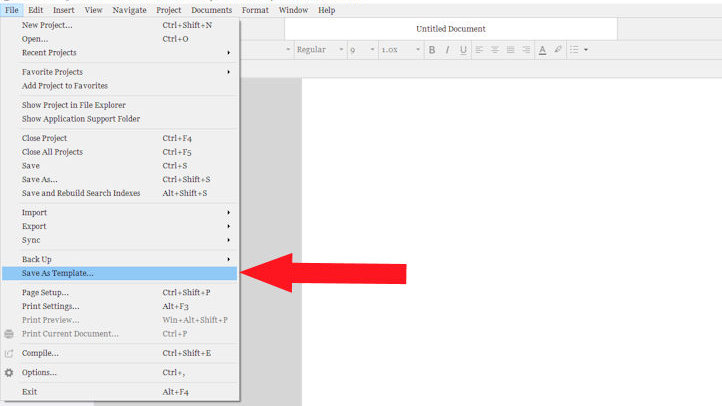
- After creating and organizing everything you want as a template, click File at the top menu.
- In the File menu, click Save as Template…
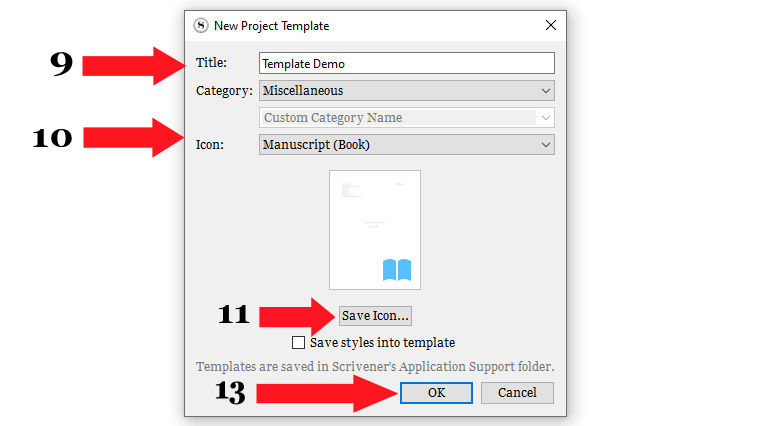
- In the New Project Template window, title your template.
- Select a Category. If you pick Custom, you can name a category that will show up first in the Project Templates window with Fiction and the other major categories when you open Scrivener. Otherwise, you’ll click your chosen category before you can see your template.
- Select an Icon.
- If you customized text styles in your template, click the box labeled Save Styles into Template.
- Click OK.
|
|
|
Tutorial Part II: Document Templates
- Create a folder in your Binder. You’ll be designating it for your templates.
- On the top Menu Bar, click Project.
- In the Project menu, click Project Settings…
- On the left menu of the Project Settings window, click Special Folders.
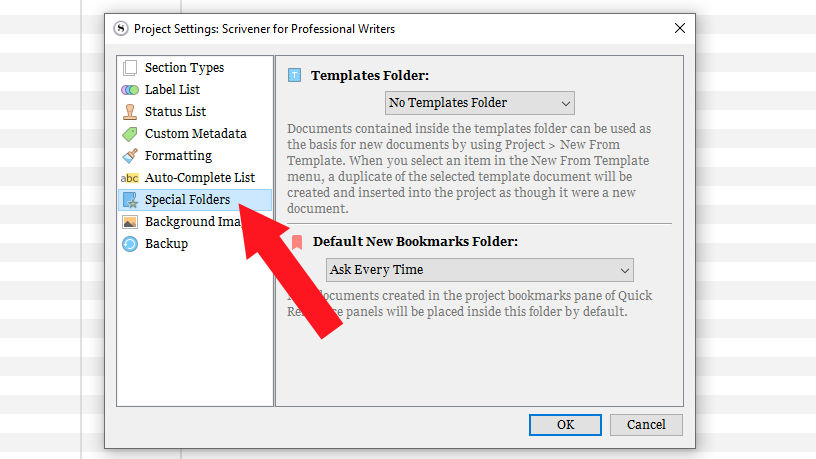
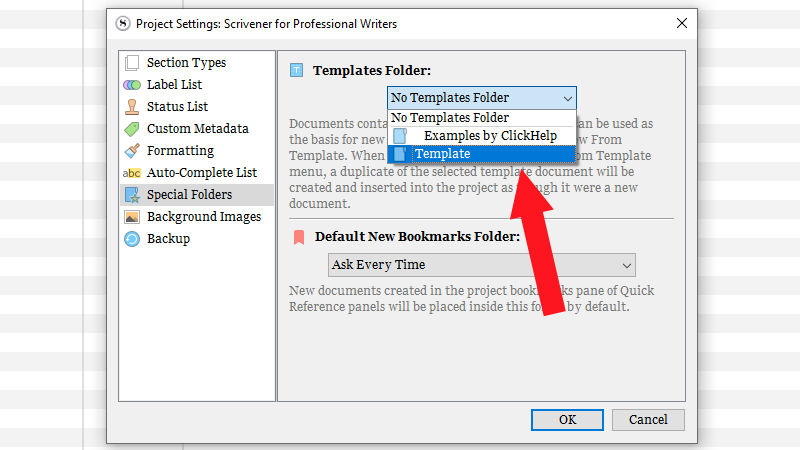
- Under Templates Folder, click your designated template folder name. This will give the folder and anything you put inside it new T icons indicating they're templates. Their structure can be added again anywhere by going to Project and pointing to New from Template, and clicking your template.
|
Conclusion
That’s how to create custom templates. I hope you see the potential in creating your optimal workflow in Scrivener, and that this tutorial has made the process undaunting.
In the next tutorial, you will get some ideas on how to organize and manage blogs. Even if you don’t blog, you may find it useful because it will show how to manage multiple, recurring assignments as one Scrivener project.
Created with the Personal Edition of HelpNDoc: Free EPub producer