How to Use Labels to Organize Progress
How to Use Labels to Organize Progress
Introduction
Labels make tracking in Scrivener a lot like spreadsheet programs like Microsoft Excel. Labels don’t come with a spreadsheet, but they make it easy to track correspondences. You can use different colors depending on if you have yet to contact a client or agent, reached out once and are waiting for a response, are doing a follow-up, or are farther along and waiting on feedback on your work.
Here’s how you can set up Scrivener to sort the stages of your correspondences with Labels.
Tutorial
- Click a file so the labels will be visible once you activate them.
- Click Inspector.
- At the bottom of the Inspector, click the Labels menu. By default, it says No Label but shows an arrow.
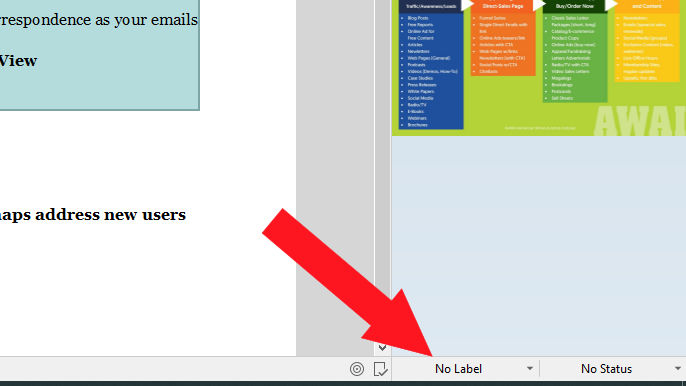
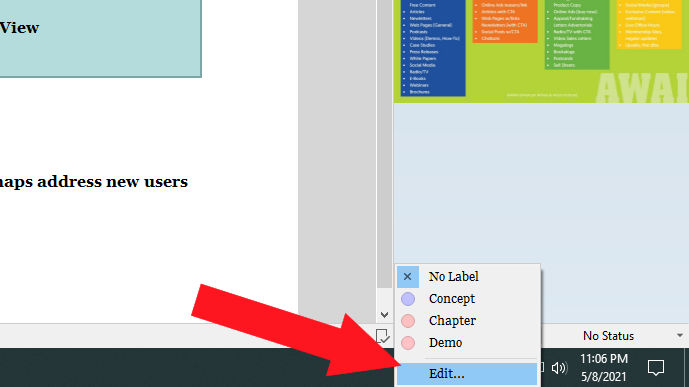
- In the Labels menu, click Edit… in the Labels menu.
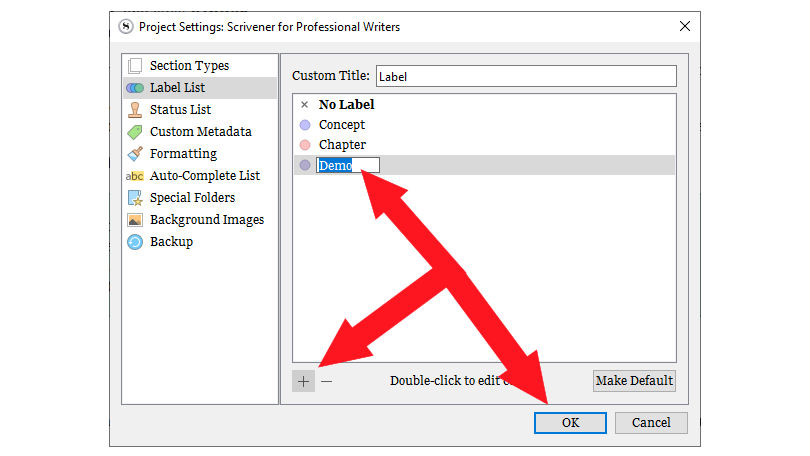
- In the Project Settings window, add Labels by clicking the +. Delete Labels by clicking the -.
- Double-click the colored circles next to the Label to change the Label’s color.
- Double-click the Label’s name and enter a new name to rename a Label.
- Click OK.
- On the top Menu Bar, click View.
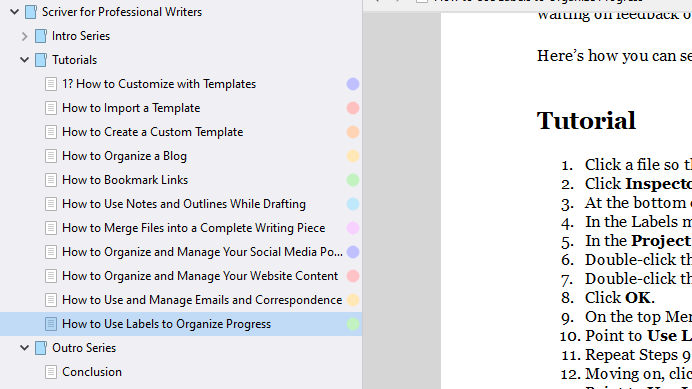
- Point to Use Label Color In, and click Binder.
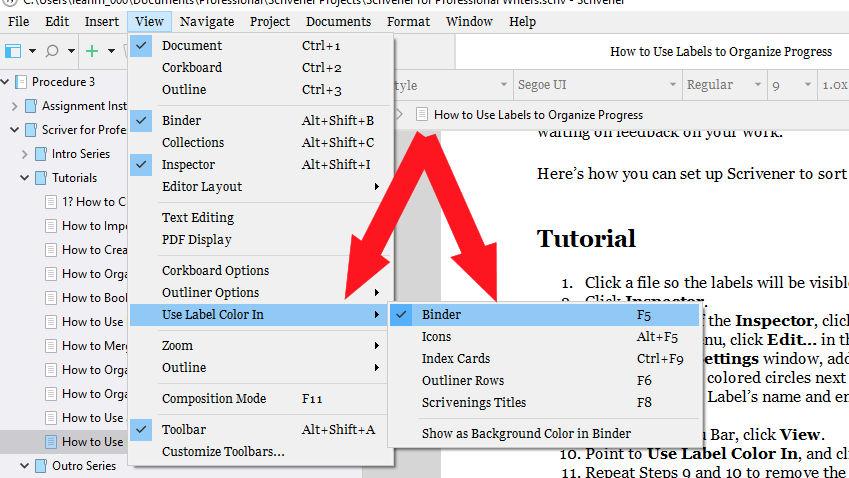
Result:
- Repeat Steps 9 and 10 to remove the Label Color in the Binder.
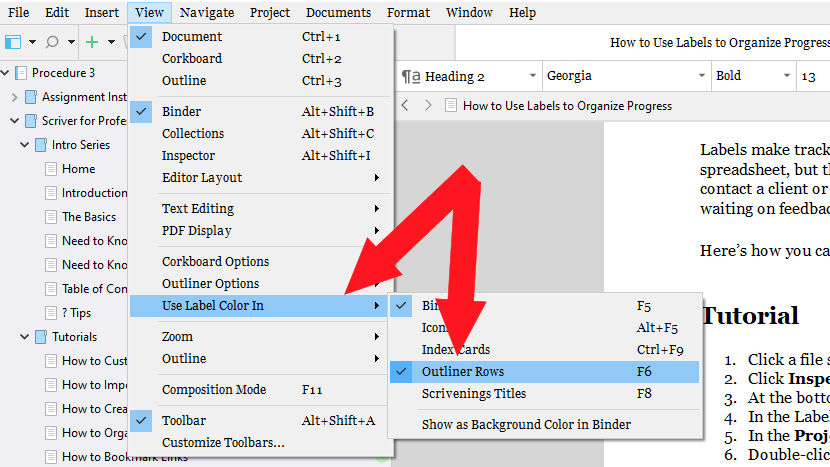
- Moving on, click View.
- Point to Use Label Color In, and click Outliner Rows.
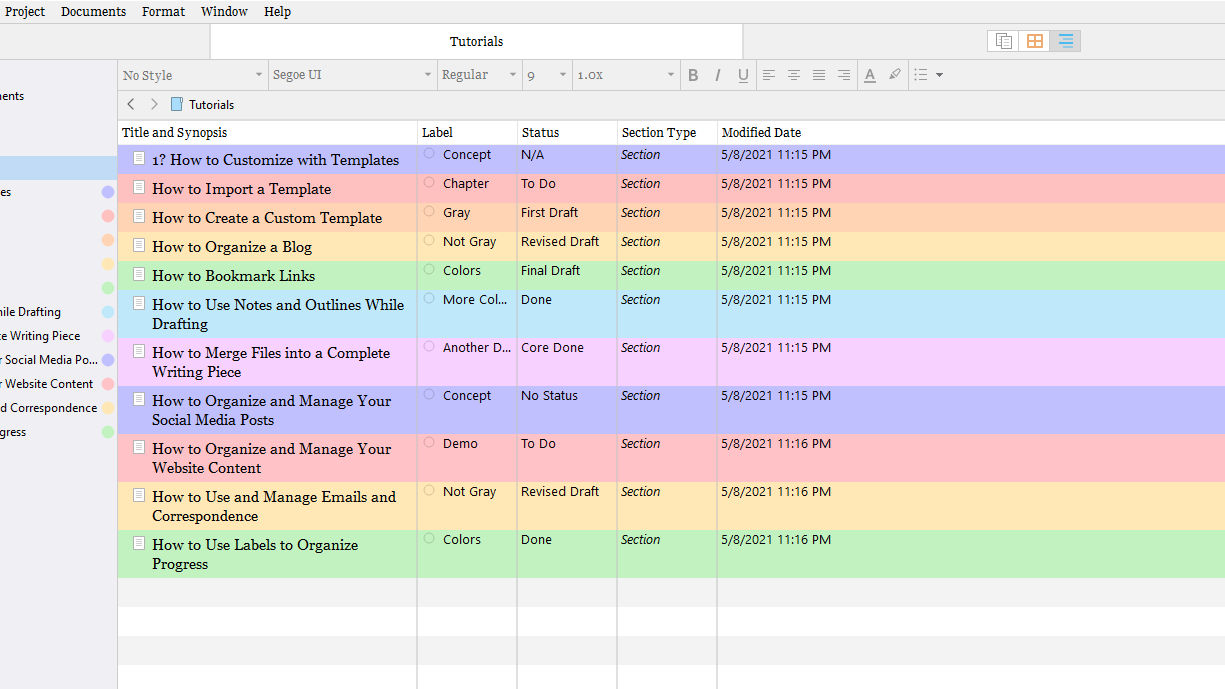
- Click the folder you’re working in and click Outliner mode from the top of Scrivener, or find it under View. You can see the Label-colored outline now.
- Repeat Steps 12 and 13 to remove the Label Color in Outline Rows. You will still see the circles in the Label next to your correspondents.
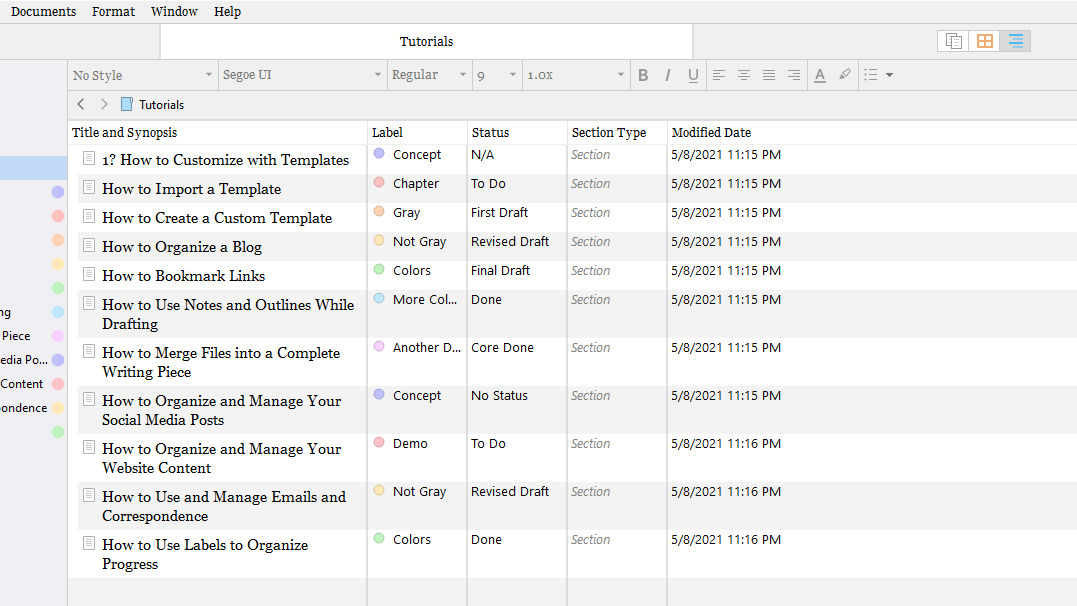
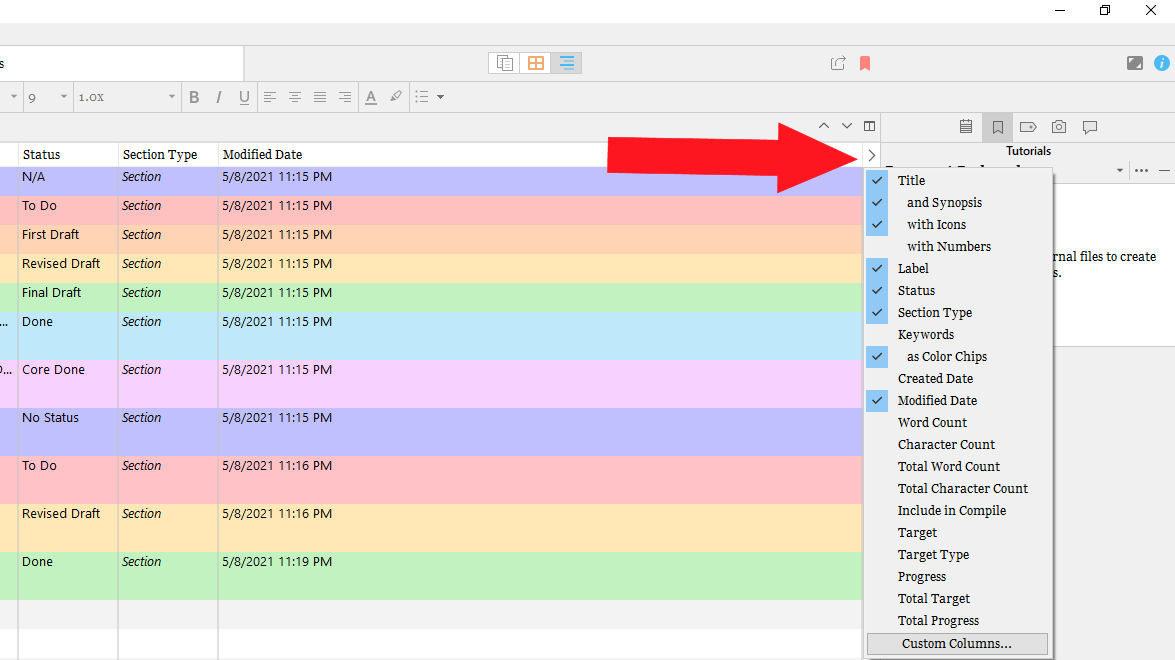
- You can modify the columns from the right-pointing arrow in the upper right corner of the Editor window.
|
Conclusion
That’s how you as a professional writer can use labels to organize your progress. Hopefully, you find it a useful and worthwhile approach to managing client relationships and the like.
Now that you’ve gone through all of my tutorials, move on to the Conclusion where I’ve compiled the resources I referred to throughout the tutorials.
Created with the Personal Edition of HelpNDoc: Free EBook and documentation generator